Sunday 4 December 2016

The absolute last sort out for 2016

We got a gap in the weather a week or so ago, so we were able to go out and get the last of the tidying up done.


This was smothered in two clematis and a yellow rose for the season but it wasn't too bad to clear away.  I cut through the stems about a foot up from the base of the clematis and then teased out the tangled mass from the trellis..... then trimmed back the rose.
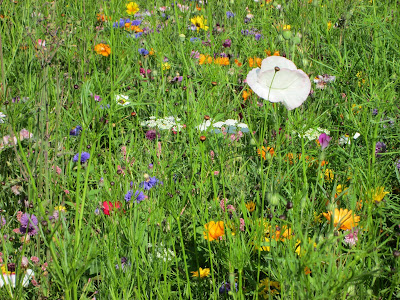
the trellis in June

I have three little pergolas in the garden that have clematis growing through them so, again, they need a trim a few inches above ground and the rubbish pulling out.  I like these as they add a bit of structure and something to look at in the winter.


All I did in the front borders was cut back any overhanging vegetation so the pavement was tidy again and nothing was flopping on to the lawn.  The rest can take care of itself.


I have eight (four pairs) climbing roses on some trellises in the back garden.  They were very badly massacred to allow the new fence to be put up last Christmas and they did almost nothing this year - very spindly, unhealthy growth with a handful of flowers.  This is one of the pair of white roses on the side which wasn't replaced and they did reasonably OK and have cut back for the winter in the usual way.  That said they hadn't been disturbed and still weren't great (???)


This (below) is one of the New Dawn pair which looked just awful this year.  New Dawn is as tough as old boot so I am surprised.  I really don't know what to do for it.  I didn't have a single decent lateral to tie in and trim back to.  This felt like the best I could do.  I may leave it at this and see what happens next summer after a rest and good feed or, the other thinking is, I get really brave and cut every stem down to a foot above ground and see if we can start again.  I would welcome opinions if anyone has sorted out an old unproductive rose.


Our first snow came early this year - 18th November.  It was only a smattering and it got rained on but because the temperatures stayed low it lasted a couple of days in our neck of the woods.


At the same time as looking out at that a couple of my plants were still doing their thing beautifully inside the house.

This orchid has been flowering since August.  Its last bud has just opened and I have 32 wonderful flowers smiling away at me in the sitting room.  If there is a downside it is that it simply does not look real.  I assure you it is and I am very proud of it.  This came to me as a nice enough little orchid from Tesco which did its five or six flower thing quite quickly. I cut back the stem and parked it on a windowsill expecting the leaves to die.  It got a teeny bit of water now and then and that was it.  Gradually it grew to this.


This little goer is a common enough -a Christmas cactus which thinks Christmas comes about four times a year - it is off again.  You really need to get up close and personal and really look at how wonderful each flower is.


So that's a wrap for 2016.  Have a lovely Christmas however you celebrate it and I wish you a healthy and happy New Year.


Monday 10 October 2016

Putting the garden to bed.

We've had some nice sunny days this week so I had no excuse but to get out in the garden and 'put it to bed'.

My other half removed the timers for the watering system and turned off the taps that feed the outside taps.  If you have any outside tap that doesn't fully drain (neither of mine do) they should really be wrapped in something like bubble wrap to keep the worst of the freeze out.  It can freeze further back than the tap if you have any water trapped in a pipe and that can expand and crack the pipe and next year you'll have a leak.  Often they are in the very worst of places and a fiddle to replace/repair.

Cut down dead and dying herbaceous plants.  That said, I leave ones that will look good in the frost and snow and those that may feed the birds or make a winter home for good bugs and critters.  Basically I hack down the ones that will fall over and become straggly messes.

I threw away my hanging basket and two chimney pot fillers that have done their thing and I will be off to somewhere like Park Farm to find their replacements for the winter.

Climbing roses can take a small hack back to stop them flailing around in any high winds.  I do the major trim in Spring.  As we are 'in the North' I don't want to risk too much die back from any frost if we get a bad winter.  To be truthful I never managed to get this job done in my time in the garden this time, but I will be doing it soon.

I shaped up a couple of olive trees that came out of their pots and went into the border this year.  They had put on a lot of growth and I want to keep them almost like topiary balls.  So, obeying the maxim 'cut for shape in the autumn and for growth in the Spring' I gave them a trim.

Most of all I was out there to plant a heap of bulbs.  B & Q have a pretty good deal on some nice quality bulbs right now so I picked some up on a paint buying trip.


If you do the maths you might figure out that three of each variety meant  planting 126 bulbs - doesn't sound much but it was enough for me.  I remembered the days I would go out with fair size sackfuls of daffodils to plant..... not any more.


These really are tulips from Amsterdam brought back from a friend's trip there.  They have gone in a pot rather than the ground as I don't do very well with tulips here - too wet for them really.

As for the planting - this blog is more about sharing what I've got away with for donkeys' years when gardening, rather than the perfect way to do things.

Ideally (most) bulbs like free draining soil, so you can add sharp sand or grit to the hole plus a little bone meal.  The hole should be twice the depth of the bulb.  In reality I make the deepest slit I can make with my trowel, wiggle it a bit, push the bulb in (right way up) pull the trowel out and close the slit - job done.  It works well enough for me.

So, I need to spend one more day out there, before winter sets in, to hack off some climbing rose stems, check the borders, sprinkle slug pellets absolutely everywhere.  I do mean everywhere - they love lurking in nooks and crannies especially over winter; they need to be lured out in hopes of killing a bunch of them.  Less to breed in the spring.  Reminder: only scatter the amount recommended; more is not better, it actually puts them off because the smell is too much for them.  This is a bait after all, so they hunt the bits of food (aka slug pellet) lying around and Goodnight Vienna.

At this time of year people with beautiful lawns aerate them and brush in sand and bone-meal to help the drainage and to strengthen root growth - do NOT feed at this time of year - you'll get soft sappy top growth and basically it will weaken the grass.  I skip a couple of these steps but I do scatter some bone meal over the lawn to boost the root growth.

On that cheerful note of snail death and crushed bones - bye for now - time to hunker down and dream of cocoa days ahead.


Saturday 24 September 2016

Pruning box hedge

I have been growing a little box hedge across the front of my what was once patio since 2007!!  It was planted to hide the concrete slabs which edged the patio.


2007

This means the garden side of the hedge appears 'uneven as the garden drops two feet diagonally from the left to the right side.  I have always intended that the hedge would be about 18 inches high above the edge of the patio and on a level looking from that side.

Now we have the conservatory it certainly needs to be in line with the bricks on the conservatory wall when looking from either side.


2015

Box is notoriously slow growing and here we are nine years later (well eight actually as this is a photo from last year) and we still aren't quite there but, at last, we are pretty close.

Every year I have cut it to shape with some hand shears and every year have had a blister the size of saucer on my hand to prove it.

This year I succumbed to a great offer (Groupon? £16.99) and bought some small cordless shears.  I admit to being doubtful that either they would be strong enough or that they wouldn't chew up the box.  Wrong in both cases.  They were sharp and efficient and did the job in about a tenth of the time and sans blisters.


I got my other half to cut me three pieces of wood and screw them together to make me a cutting guide.  I just slide this 'bench' along as I cut.....


and used it as a guide, cutting from the other side of the hedge and keeping an eye on the top of the bench to make sure everything was cut to that height.

The traditional day for cutting box hedges is Derby Day - first week in June - but really you can do it more than once a year and pretty much as often as you like in the growing season.  Otherwise like almost all pruning/hedge cutting the general rule is cut for growth in spring (March/April)and cut for shape in late summer (August/September).

Saturday 17 September 2016

Regular Jobs

I realised talking to someone who is tackling their first garden just how much stuff 'gardeners' think is 'obvious' when they've been doing it for years!  We had a conversation about how often to do this or that so I thought I'd list the basic stuff I do and how often I do it, in hopes of helping any Newbie.


Feeding summer flowering containers and hanging baskets:  Use half strength cheap tomato food - obviously you can use super-duper 'proper' plant food if you want to but the half strength tomato food seems to do the job.  Water it in once a week.  I try to do mine on a Sunday so I think of it as their Sunday dinner.

Slug pellets: Start killing on Valentine's day (14th February) - the St Valentine's Day Massacre!  Then I do it around the 14th of every month - that makes it easy to remember.  To be fair the frequency may well depend on your slug pellet population - some people do it as much as weekly.  The key to success in keeping the numbers down is start early in the year and go on through until October - you can take November through January off!  The other key to success is use the pellets very, very thinly - READ and FOLLOW the instructions - one pellet about every six inches.  No, you don't have to put them down one at a time but just be sure you are not over-using them - the smell from loads of them actually deters slugs from eating them.

Feed borders:  Give them a good feed in the Spring as soon as you see some decent growth on plants.  Choice of food is down to you.  I generally use any 7:7:7 mix that I can buy cheaply.  Those numbers will make sense to you when you read a box like Miracle Grow/Grow More/Phostrogen.  I have also lobbed chicken pellets at the garden when I've seen a good deal on those.  You could leave it at that but I like to give particular plants a boost during the summer to keep them at their best - things like roses and clematis benefit from a summer snack.

Weed and Feed lawns: Pretty much the same as feeding the borders the grass needs a feed around March/April and again in high Summer (July/August).  You may as well apply a weed and feed product rather than just a lawn food and get both jobs done together.  In the Spring I find I need to rake out the dead moss after a week or so.  In the later session I might do that again if its been a wet summer and might also lightly over-seed with a mixture of grass seed and soil if I am feeling really keen on my lawn.

Cut hedges: the general rule for pruning anything (and hedge cutting is pruning) is that you prune for shape in the autumn and for growth in the spring so choose which it is you want the plant to do.  Hedges like my little box hedge can be done just once a year if you aren't looking for a pristine look all year round.  The tradition for box is to cut it on Derby Day (first week in June) BUT I prefer to cut it once a year in August - this will do for most hedges.  If you want to go for the two cut approach then May and September is fine.


Saturday 10 September 2016

More saved from the bin....

On the lines of a recent post saying I like to buy 'dying' plants in hopes of saving them - the following is even cheaper.

Lots of potted plants you buy are really 'designed' to be a one-off.  Many people, like me, think that things like orchids and amaryllis (often gifts) are just supposed to do their thing and then be binned - far too difficult to do anything else with?

Not so, I have just discovered......

I had a Tesco orchid (phalenopsis) which bloomed beautifully and for a long while and then was reduced to a few sad leaves and a short stump.  I kept it as I had a sad little landing window sill with nothing on it.  It got very little water and virtually no feeding.  This seems to be roughly the right thing to do.   Look what I have now........


I solemnly swear it has thrived on neglect.

In exactly the same vein I had two Ikea (£3?) amaryllis at Christmas that did their glorious thing and I was curious as to what they would do if I just kept them going.  Mine have done this....


They must be well over three feet tall, strong as an ox and glorious blemish free deep green leaves.  The googled advice to get them to flower again this year is to chuck them in a darkish, coolish place at the beginning of September and let the leaves die off, re-pot the bulb in an inch of fresh compost and bring back in when temperature goes below 10 degrees centigrade.

I haven't the heart to dump this one but I will, cruelly, experiment on the other..... watch this space.


Wednesday 7 September 2016

Damson Jam

If you are lucky enough to grow your own damsons here is the quickest and easiest way to make damson jam:

 Put half a pound in big jug.  Cook three minutes in microwave, stir in half a pound of caster sugar, stir until its all dissolved, put back in microwave for four minutes and its done.  Keep in plastic box or jar in fridge.


I had lunch at Park farm the other day and they had damsons for £1.49 a pound - rare as hen's teeth to find these days.  I bought two pounds, divided them into four and put three half pounds of damsons in just simple ziplock bags and then in the freezer.  I don't want a ton of jam just for the two of us so half a pound now and then when I fancy it works for me.... and it makes the damson season last longer.


half pound for the freezer

I followed the instructions I've just given you using a large pyrex jub and keeping an eye on it in case it boiled over - it didn't.

damson jam in a box

I didn't cut the fruit off the stone, it all goes in together.  My mom used to say if you complained about the stones that if you'd found too many then you must be eating too much of the jam!  We just fish them out as we go along - but do be careful when eating it they can hide inside a skin.  You can spend a jolly ten minutes fiddling them out at the finished cooking stage if you want to - but not when its at full temperature - jam is exceedingly hot.

nothing beats a jam butty

I have a ton of damson jam uses - there's a particularly nice almond cake with damson jam threaded through it but to be honest not much beats a jam butty with homemade jam and freshly baked bread - this one is all ready for folding and eating.


I haven't added the recipe to the links at the top of the blog as I already have microwave jam instructions up there and the plum recipe will cover damsons perfectly well.

I thought the recipe given here was over-sweet for my taste so I will go back to my original instructions (see Microwave jam in the recipe tabs at the top) as that has less sugar and added lemon juice.  Each to their own.

Saturday 3 September 2016

Tatton Park

As part of a couple of days break for my husband's birthday we visited Tatton Park.  He and two friends were doing a Segway ride so I was able to wander the gardens at my leisure.  It was the most wonderful experience...

We arrived half an hour before the house and gardens were officially open so I, quite literally, had the estate to myself - not even a volunteer in sight let alone a member of the public.  What an incredible feeling to be able to wander through the gardens in the sunshine in high summer and have it all to myself.  Sheer joy.

I started off in the most fabulous wild flower meadow I have ever seen.  I am so sorry that none of my photos convey the glory of this area to you.  You will simply have to imagine standing waist deep in flowers either side of you on a fairly narrowly mowed path through the centre of a vast field.  Flower upon flower each seeming better than the one before.


breathtakingly lovely

It seemed impossible to top this experience but it was maybe possible to to match it.

Adjacent to the wild flower meadow is a lovely orchard with hundreds of wonderfully espaliered trees surrounding trees in grass, dotted with bee hives.  The clean lines and simplicity of all this brought me down to earth a little.

pristine orchard


I wandered from there through Charlotte's garden which offers an even more serene landscape after all that giddiness and is used by me as my route to a garden I have always loved - the Italian Garden


Charlotte's garden

This way to the Italian Garden passes the wonderful Conservatory which was only renewed in 2011 so it is looking very sharp right now.


You then arrive sort of sideways on at the Italian Garden and only when you walk to its centre and front do you grasp its magnitude.  This garden is a large formal parterre centered on the back of the house.


It drops down a couple of levels from the house, each level as interesting as the one above, finally arriving at the fountain 


and the incredible view across the estate.


Triton flanked by the wonderful symmetrical beds - in perfect harmony


Time was nearly up so I wandered back to the house to meet my companions having only just touched on the vast acres of gardens and glasshouses that you can visit at Tatton.  I did do a quick check of its wonderful vegetable garden - a real hive of production - no messing about in here - serious vegetable growing underway on a vast scale.


If you ever can get to Tatton Hall and gardens I recommend you do so.  There is so much to see I would give it at least half a day and if you are lucky enough to have a lovely sunny day and if you are fit enough you can easily spend a whole day there. 

(The house is not open on Mondays)  Here is a link to times and fees as they are a bit complicated unless you are a member of the National Trust and then it is free.  Click here:  Opening Times and Fees

Google them to read up about all the gardens I haven't mentioned like their world famous Japanese Garden.

Click here for more photos:  Tatton Park.


Saturday 27 August 2016

Arley Hall

Arley Hall is a country house in the village of Arley, Cheshire, England, about 4 miles south of Lymm and 5 miles north of Northwich. It is home to the owner, Viscount Ashbrook and his family.

The present Hall stands on the same site as the first house built by the family 1469. The Hall standing was built between 1832 and 1845 by Rowland Egerton-Warburon to the design of George Latham, a Nantwich architect. 


- - - - - - - -- - - - - - - - - - - - - - - - - - - - - - - - - - - - - - - - - - - - - - - - - - - - - - - - - - - - - - - - - - - 


So, what at first appears to be a grand Tudor House is in fact a Victorian 'homage'.  


We were visiting the hall and garden as part of (my husband's birthday) overnight  stay in a hotel in Lymm.  Being mid  August the English summer was in full flow with a warm day and thoroughly grey skies!

If you like Victorian stately piles this is certainly one to float your boat.  Being a dyed in the wool neo-classical Georgian I can't say it was my cup of tea.

That said, the ceilings in every room were remarkable and the grand hall impressive to say the least.  I can't show you the interior, of course, as usual photography is not allowed inside the house.  It is a family home (the same family for 550 years) and still used occasionally.  I was once told the ban on photos is an insurance issue (?) The fact the house is still something of a home adds some appeal as it looks to be 'lived in' rather than frozen in aspic.

The gardens don't have a feel of a grand designed landscaped but more of a collected hotchpotch of gardens that have been added in over the years by various occupants.  Again, this is all a matter of taste as to whether that makes the landscape a better or worse one .....  sadly, for me it is just not cohesive enough to flow nicely from one space to another.

Arley is especially famous for the long border.  It was one of the earliest of its kind and is said to have set the style for the English long border - simply crammed with every plant imaginable.  This is one small section ......


Turn around and there is more... and more .... and more


A little corner that I loved was the tea cottage.  Imagine having your staff setting up a dainty tea for you here on a summer afternoon.


The vegetable garden is to die for and you are overwhelmed with lettuce envy as you step inside.  It certainly beats my (ex) three six foot long raised beds.  I often wonder where the produce goes in these vast estates.

Yet again though, I still found the area odd as it has a tall hedged area and arbour at its heart - all very formal and something I though you would expect to find in a landscape with a great vista laid out in front of it to be admired from your seat.  The kitchen garden, though lovely, somehow doesn't seem to warrant it. 


The house and garden is still privately owned and it costs £10 for seniors to go in to all the areas.  I suggest you google it if planning a trip as there are various charges according to your age and where you want to go.

Click here for more photos:  Arley Hall


Saturday 20 August 2016

Take a punt

I like to 'rescue' sick plants!  Strange, but true - not only do I get the satisfaction of having brought something back from the brink of death but they only cost me pennies.  It is always worth the gamble of something making it or not - they rarely fail with a bit of TLC.


This lovely passion flower has three six foot stems and over twenty buds to come out (more to come after that no doubt).  It was a sad little thing in a tiny pot for 49p back in the Spring.  I had bought my friend one for her birthday at the usual sort of price from a reputable nursery which didn't look fantastic for its price and has struggled to do anything as yet.  A short time after giving that away I thought how much I wanted a passion flower for myself and I saw this one.


At the same time as buying the passion flower the shop was selling what appeared to be two dead sticks for a pound - not properly labelled - could have said magnolias?  I genuinely thought these might be consigned to the rubbish bin but I faithfully stuck each of their badly damaged hairy little roots into a pot of their own where they remained all winter as two dead sticks.  Spring arrives and - and Bingo! - I have two very promising magnolias (????).  

I have no idea what variety they are so they could be anything from six feet to thirty feet tall and wide when mature.  Looking now at the stick and the size of the leaf it is reasonable to think they are common old magnolia soulangia, so they are the big ones!!   I am seventy and they take twenty years to maturity so may not be a bother to me when they swamp the garden.  In truth I do have the right spot for one of them.  The other may just reside in a pot for a few years and I will think again then.  Meanwhile whoopee-do, three lives saved; total cost, £1.49.


Friday 5 August 2016

Short back and sides


I showed you some photos of my lovely fluffy border a couple of days ago - all four of them were something like that at that time.  Eventually they start to 'go over' and look untidy and some plants bully out the others so this is a good time to give it a judicious chop.


letting the corner breath again

Two corners have eight feet high thalictrum in them which is fabulous when it is in full flood but they had finished flowering and even though they have pretty seed heads they always swamp out other things around them so it was time for them to go.

neat and tidy again

all these plants only went in a couple of months ago so there is some growing to do yet but it is promising


I cut back all the thalictrum (meadow-rue), oriental poppies, granny bonnets and dead-headed the roses by cutting them back quite a few inches.  I then lightly fed the garden with some 7:7:7 national Growmore.  These are granules and easy to chuck a handful here and there a couple of times in the growing season - once in late Spring and once in late summer.

If you are lucky with this chop and feed and weather permitting we often get a second flush of most things.

I also did my usual mid month slug pelleting - a bit late I know but I wasn't here to do it on time.  I tied in some bits and bobs and basically did a close inspection of this and that to check all is well.  This hour or so is time well spent if you can give yourself up to it round about this time of year.


Wednesday 3 August 2016

ECO Plant Holder

I thought I would share a nice find with you.  I got these on sale at a silly price (£1.99???) from Wyevale Garden centre but worth keeping your eye open for as they are proving very handy.


I just Googled them and you can get them for around a fiver (three in a pack) from various places.  They store flat and therefore easily, they won't rust or rot(?) and are made from recycled plastic..... coffee cups I think.


They are designed to fit in horizontal fencing without additional support.  They can also be screwed in place (two holes in top tab) or hung on a hook or a nail in a wall or fence.

I have vertical lapped fencing so it is no use for me in its primary form.  I also don't want fixed pots in fixed places so I lob mine around where I want things using 'S' hooks over the top of the fence.
waiting for its pot

brightens up a bit of empty fence


smells lovely where I walk past